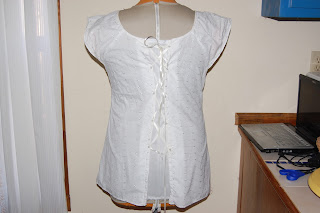
I saw it and loved it. The store had two, in different sizes. I tried on the smaller one and it was just a little too small. So, I bought the other one. I got it home and found out it was the same size as the one I tried on. I was really disappointed. Then I started looking at it and got an idea. I could make it just a little bigger by adding a panel in back. Here is how I did it:
Materials:
One top that is slightly too small
One piece of matching or contrasting fabric
10 metal eyelets
1 length of thin elastic
Sewing machine
Matching thread
Eyelet setter
First I removed the elastic from the sleeves, only because I don’t like elastic around my arms.
Then I removed the stitching from the center back.
I cut a panel of fabric 10 inches wide by the length of the top with seam allowances. First I sewed the panel in, right sides together:
Grey represents wrong side, white is right side.
I did this on both sides.
I then sewed another seam with the fabric wrong sides together. This seam allowance was slightly wider than my eyelets.
I then sewed another seam with the fabric wrong sides together. This seam allowance was slightly wider than my eyelets.
I then placed a line of eyelets, five on each side, evenly spaced down the back of the top:
I laced a ribbon through the eyelets:
I didn’t like the way the ribbon looked. It was hard to adjust and started to fray. It also tended to untie.
I replaced it with a thin length of elastic. The top is much more comfortable. I can pull it on and off without untying it.
As you can see, I did not put the eyelets all the way down. I like the way it flares at the bottom.
I think this would also be cute with a different colored top, maybe with a contrasting piece of fabric and multi-colored eyelets.


No comments:
Post a Comment